
Topic: DIY DSLR - Giving New Life to Old Equipment
Disclaimer: Attempt this at your own risk. I am not responsible for damage caused to your equipment.
Webcams are a great starting point for new brickfilmers. They are inexpensive and most of the time have no problems getting in focus for close-up shots. But as you gain experience and think of more creative shots, the device becomes increasingly limited in its abilities given its low resolution and wide viewing angle. DSLR cameras solve this problem with a variety of interchangeable lenses and excellent quality, but at a heavy price premium. For many brickfilmers, there is no room in the budget to make the switch from webcam to DSLR. I was faced with the same dilemma, and because I have experience with ballin' on a budget, I considered what was possible with the items around my house. What did I have? A Quickcam Pro 9000, a box of old SLR film cameras, some obsolete digital cameras, and a hot glue gun. In this post, I'll detail how I used these items to make a Frankenstein DSLR that is both suitable for brickfilming and affordable to build.
Note: I was mainly building a prototype to see if this was even possible, so I didn't photograph every step of the process. I borrowed a few pics from the internet to fill in the gaps
To start off, I conducted some preliminary research to see how people approached a similar modification. Most examples were using microscopes and telescopes, but the concept was simple: remove the webcam's native lens and replace the scope's eyepiece with the webcam's imaging sensor. In some cases, the sensor was closer to the lens than the original eyepiece. I did additional research on optics to understand how the SLR lenses will interact with the sensor in my case. By the look of it, the webcam will have a smaller field of view than the camera because the sensor is significantly smaller than the frame in the camera that would've been exposed to a section of film. With that in mind, I got to work.
I disassembled the Quickcam and prepared to remove the lens assembly. It is attached to the circuit board by two screws on the underside and two soldered-on electrical contacts on the top. The contacts connected to the focusing mechanism of the lens (shown below). I removed the screws and desoldered the contacts to remove the assembly, exposing the CCD sensor.

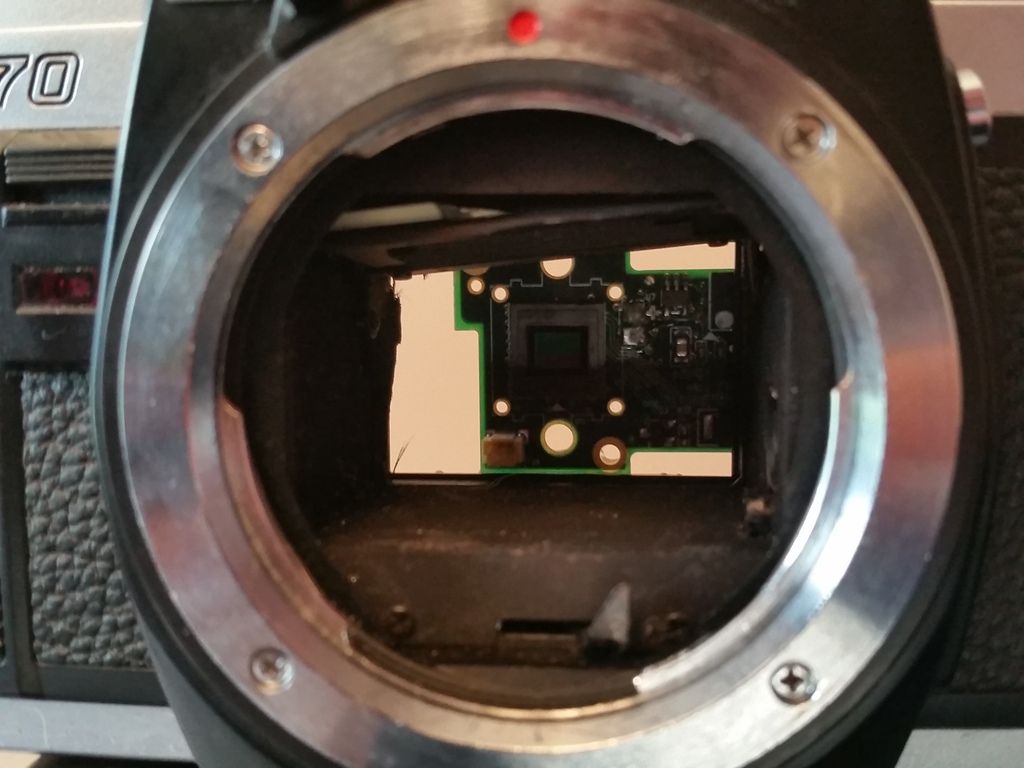
With that all said and done, it was time to insert the sensor into the camera, a Minolta X-370. I attempted to remove the spring loaded mirror, but in the process jammed it in the upward position (hey, it works!) and cut away the cloth screen that would've shielded the film from exposure. Lining up the two had revealed components standing off the board would set it back from the camera body by a few millimeters. To be able to secure it in the position, I needed something thick enough to stand it off from the body, so I used a couple 1x4 LEGO System pieces. The holes on either end and ribbed undersides made it easy to apply hot glue and establish good contact between surfaces. I then lined up the board between the pieces and it just so happened to fit snugly in place. using eyeball precision, I made sure that the sensor was centered and the board was not set at an angle, then secured it in place with hot glue.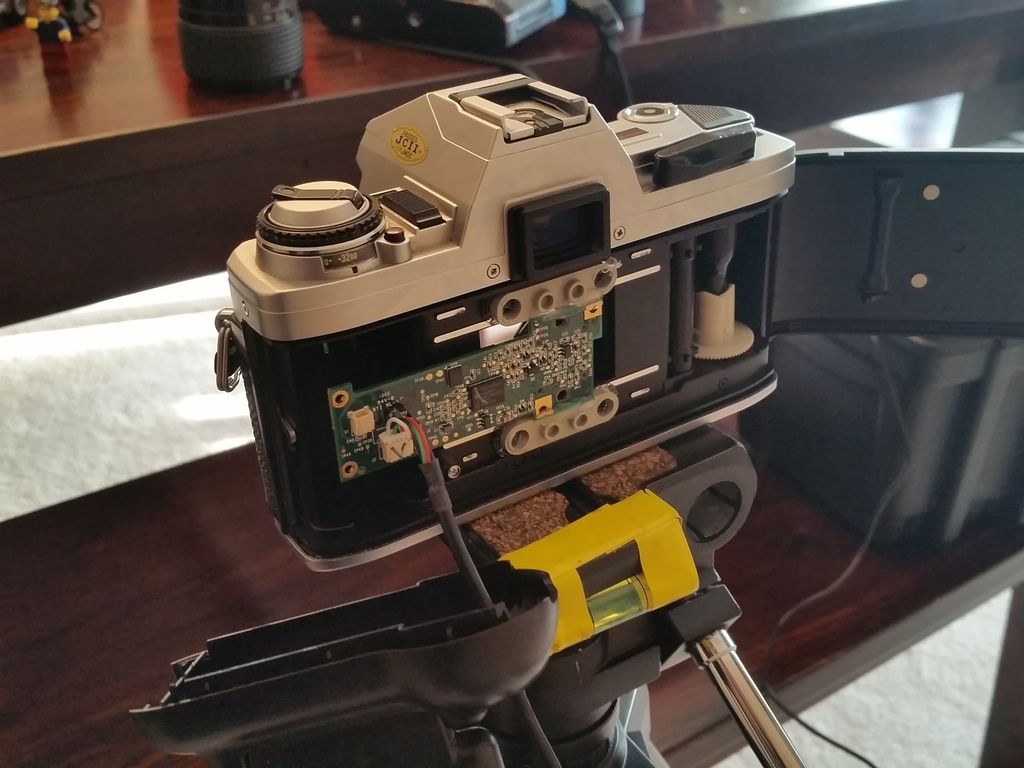
It was now time to plug the camera into the computer and test it out. After a couple minutes of tinkering with the lens, I had a visible image. However, it had a reddish hue, and objects had a bit of a glow effect. I concluded this was occurring because the sensor was missing an IR filter, which was attached to the old lens assembly. Separating the two pieces of the assembly (the base that attaches to the board and the lens/focus mechanism) revealed that its IR filter was attached to the lens and was not large enough to lay over the opening in the base piece. So I pulled out a 15-year-old FujiFilm FinePix from storage, disassembled it and scavenged its own IR filter, which looked to be large enough to cover the base piece. Sure enough it was, so I hot glued it to the base and reattached it to the sensor board.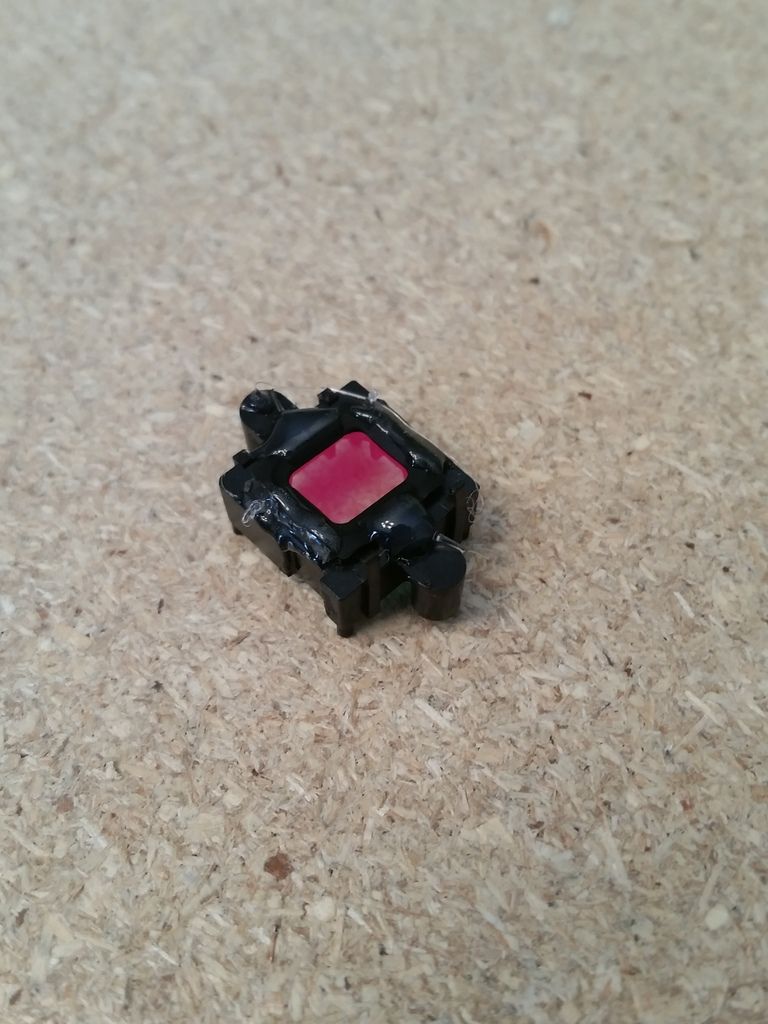

I plugged it in again, and sure enough that fixed it! With a 28-70mm lens, I assessed the capabilities of the new camera. Compared to the stock Quickcam, it is already doing excellent.
Here's a typical shot from the stock version. This is about as close an object could be to the camera without going out of focus
Now compare that after my modification: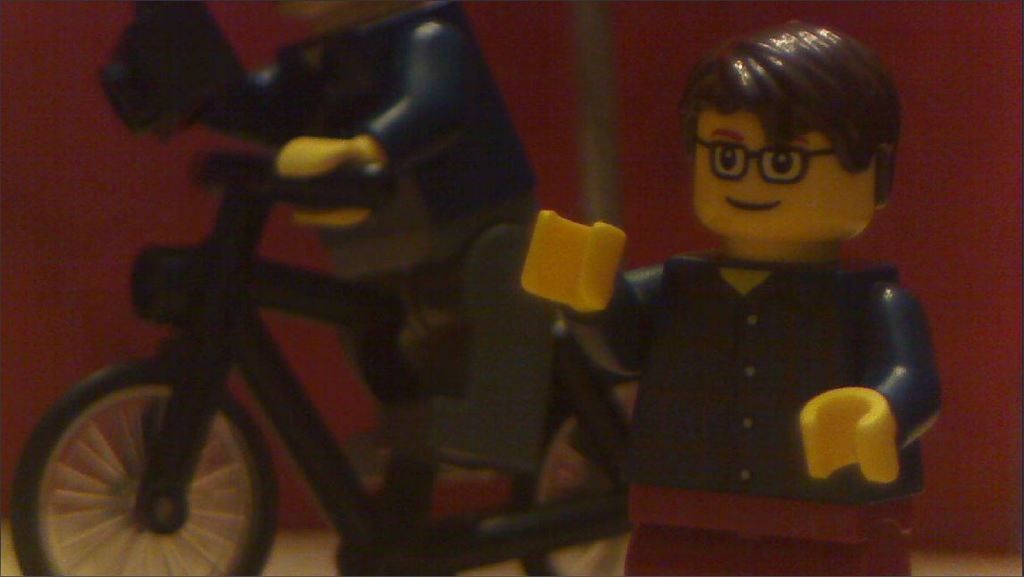
This is at a distance of about 24 inches, though objects can be as close as 12 inches. The minifig on the bike is about 1.5 inches behind the foreground minifig, but the depth of field effect is increased as I zoom in on the foreground. While I see many places where this will work well, it is just about the only benefit of the setup.
The downfall of this setup is where a wide FOV is required, for example shots of rooms or large objects. For example, this is a car at a distance of around 4 feet from the camera. The lens is at wide angle and the focus is at infinity. Objects any further than this will not be in focus without zoom, and the FOV is just wide enough for the car to fit in the shot.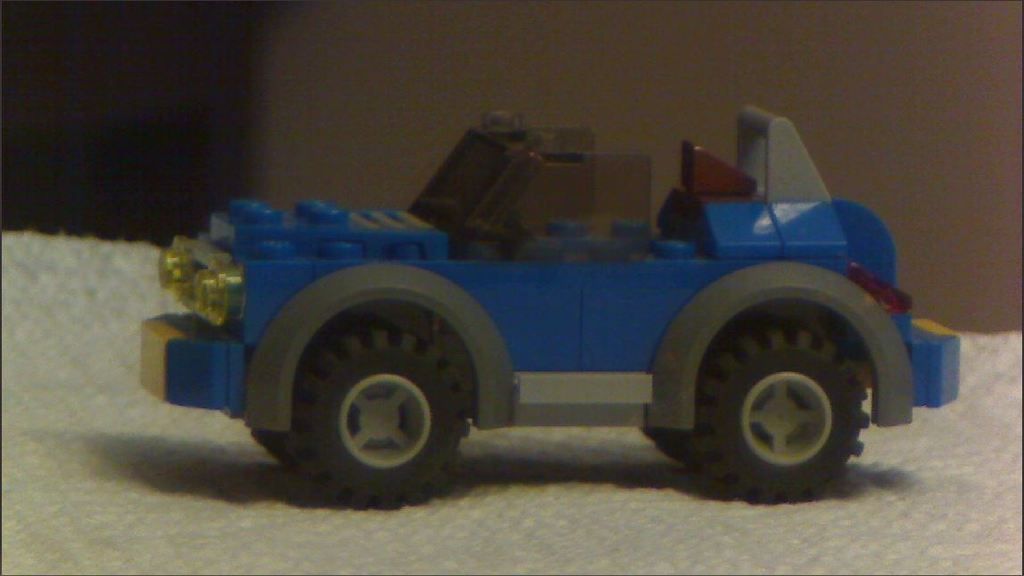
I conclude this is a result of the image size issue previously mentioned. The sensor is not large enough to receive the entire image hitting it. There are two approaches to solve this as far as extending the range and FOV:
-Using a webcam or basically anything with a larger image sensor (which gets expensive)
-Moving the sensor closer to the lens and thus closer to the focal point (This is the better of the two, but cannot be done with the SLR body being used)
It seems to use this in the long term, I'll have to build a custom body to accomplish the latter. That would just mean attaching the sensor and the camera's lens bracket to a small box with a shallower depth. For now, it will accomplish what I want it to do: close shots of minifigs.
Pros:
-Good for minifig closeups and depth of field effects.
Cons:
-Limited field of view
-Limited viewing distance
FrankenSLR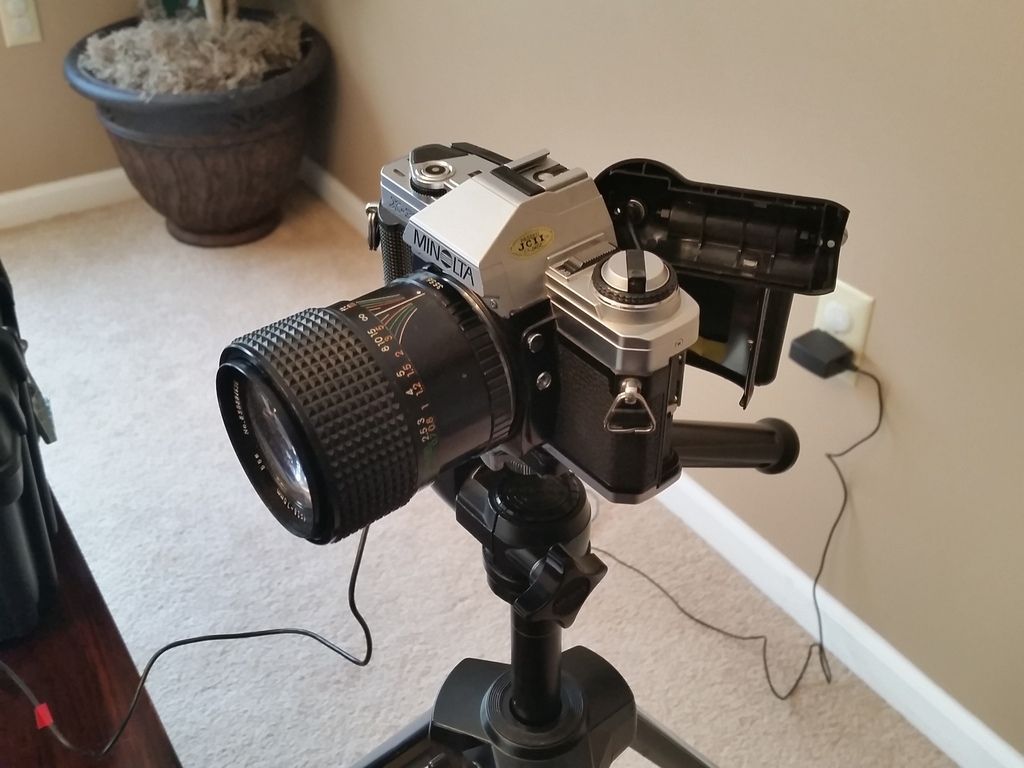
Overall, I would call this a good way to get DSLR quality on a budget. Webcams like the QCP9000 can be found cheap, and a film SLR with lenses can be found on eBay for under $50 USD. However, I would recommend you research similar projects online if you would like to try this yourself, as handling a circuit board with an exposed image sensor requires a careful hand, and the wrong parts can be damaged if the proper caution isn't taken. But if you're still feeling up to this project, give it a try and I wish you luck with your pursuit for a better brickfilm!
Last edited by PanPeteProductions (December 21, 2016 (08:33pm))