Here is the graffiti tutorial. I originally learned this technique from this video by GimpKnowHow. I have just added a few tweeks, and turned it into a written form.
Difficulty: ★★ (Out of 5; 5 stars being very hard and 1 being very easy for future reference.)
What you will need:
1. Gimp- It's a free photo editing program that can be downloaded at the Gimp website.
2. Brick Background-CGTextures is a good site that has lots of high resolution textures, and only requires a free registration.
3. Splatter brushes- this set of paint brushes can be downloaded here.
4. Script-Fu (Bevel & Emboss)- This is required to make a 3-dimensional effect; download it here.
5. Graffiti Font- The font I'll be using is Writer's Original, but you can find other good ones here.
Let's get started!
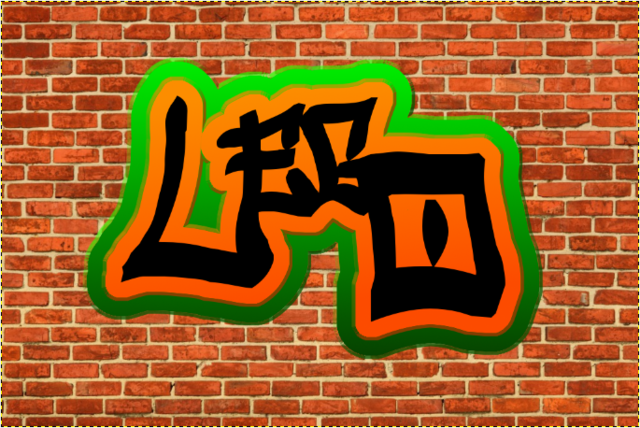
First, open your brick texture in Gimp. This can be done either by right-clicking the image and selecting "Edit with Gimp" or opening Gimp, selecting the image, and then pressing "Open." Then resize and/or crop the image to size you want.
Next, create you text by selecting the text tool (T). You can either make the text uniform, or create a new layer for every layer, position, and resize each letter to give it that graffiti look. Once you done, click the visibility icon ( ) and then right-click on any text layer and select "Merge Visible Layers." Then move you text to wherever you want and then right-click and select "Layer to Image Size." Make the brick background visible again.
--------------------------------------------------------------------------------------------------------------------------------------------------------------------
Optional:
You can apply and extra underline or accent mark by using the paths tool (F), hitting enter to convert is to a selection, and then filling it with black. Merge this down to the text layer.
--------------------------------------------------------------------------------------------------------------------------------------------------------------------
Right-click on the text layer, select "Alpha to Selection," and create a new layer. Grow the selection (Selection->Grow...) by, in my case, 55 pixels. Select two colors: one a lighter shade of the other. Your color swatch should now look like this:  Select your gradient tool (L) and stroke downward. Then select none (Ctrl+Shift+A). After you have done that, go up to Script-Fu->Layer Effects->Bevel and Emboss. Again select the the lighter and darker shades of your color and set the depth to 7. Click OK. New layers will be created. Right-click each new layer and select "Merge Down." Repeat this step, only with a different, contrasting color and don't grow the selection as much. Then merge the two outline layers. The end result should look like this:
--------------------------------------------------------------------------------------------------------------------------------------------------------------------
Optional:
Right-click the text layer and select "Alpha to Selection." then select the outline layer and click Edit->Cut (Ctrl+X). Duplicate the layer (Right-click->Duplicate Layer).With the top outline layer selected, click Filters->Edge-Detect->Neon. Turn the Amount down to 0 and the Radium up to to around 50. Click OK. Set the layer mode to "Overlay" and turn the opacity down to your liking. This gives it more of a painted look.
--------------------------------------------------------------------------------------------------------------------------------------------------------------------
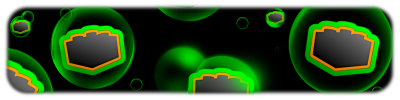
Now it's time to make it look like it's really spray-painted onto the wall. First, select the text layer, "Alpha to Selection," take two shades of grey, and apply the gradient onto the text layer. Select none. Go up to Filter->Map->Bump Map. Select the brick layer as the bump map, turn the Azimuth down to 0, and make sure the X and Y offset are set to 0 as well. Leave everything else at default. Do this step three times to the text layer and lower outline layer, not the edge-detected one if you did the optional step. Now all we have to do is add splatter!
Create a new transparent layer under everything but the brick background. Use your outline colors as you brush on splatter, but make sure to not use the same brush twice. Once done, you can apply the edge-detect effect if you want to. Then apply the bump map to that layer. You're done! Here is the finished result:

If something isn't working, tell me and I will look into it. Then I'll edit this tutorial. Happy Gimping! 
Last edited by UniLego (April 19, 2010 (08:03am))
Latest video:
splat.